heshamdsh

بلدك : 
الجنس : 
عدد المساهمات : 1109
نقاط : 60923
السٌّمعَة : 0
تاريخ التسجيل : 27/01/2009
 |  موضوع: The "Computer" الكمبيوتر موضوع: The "Computer" الكمبيوتر  الإثنين 29 نوفمبر 2010, 12:04 am الإثنين 29 نوفمبر 2010, 12:04 am | |
| The "Computer":The part of the computer that most people refer to as 'the computer' is simply a box that holds most of the components that make up a personal computer (a 'PC'). This page will explain the function of some of the components/connectors that are visible from the outside of the 'box'. I will cover the internal components later in the tutorial.Front Panel Buttons/Switches:In the following picture, you can see the front of a basic computer. It has only one optical drive (a drive that uses a laser to read the data from the media) and no floppy drive (many newer computers do not have floppy drives). Below the drive area, you can see that there is a large oval button. That's the power switch. Its used to turn the computer on and off. There are other ways to switch the computer off and I'll cover them later. The smaller button below the power button is the reset button (only to be used in the case of a serious crash where the computer freezes). On some machines (machine is slang for computer), the reset button is omitted. If that's the case with your machine, you can reset it by holding down the power button for ~5 seconds. 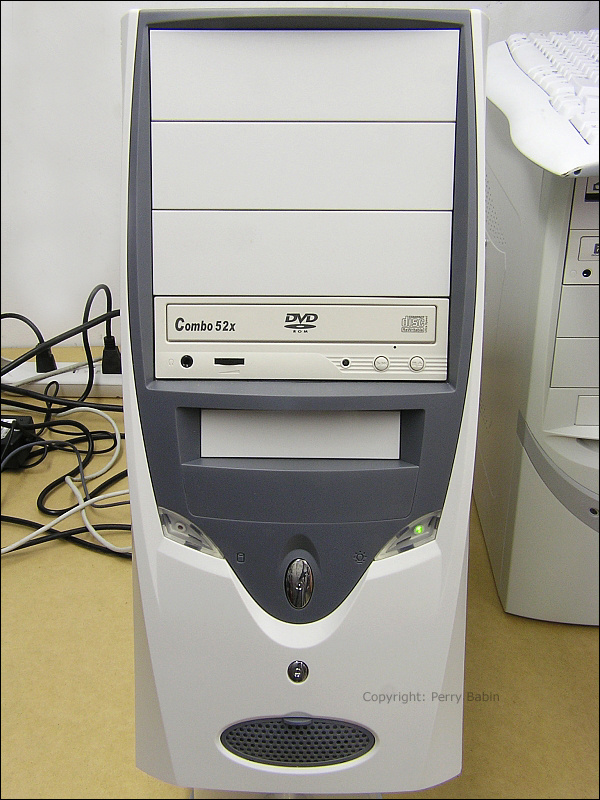
I mentioned the 'power' and 'reset' switches. On new computers, they have somewhat universal markings to indicate which is power and which is reset. In the following image, you can see the front of a computer (a different computer). The power button is marked with the 0/1. The reset switch (the same color as the case here) is marked with a triangle inside of a circle. 
Front Panel Lights/Indicators:To the left and right of the power switch, you can see two LED indicators. The left indicator is the hard drive activity indicator. It is lit when the computer is accessing the hard drive. In the picture it is not lit and you can only see a hint of red. On the right, you see the green 'power' indicator. It's lit whenever the computer is on. On this computer, the colors red and green are used but the colors for the hard drive indicator and the power indicator will vary from one manufacturer to another. Don't let it confuse you.Rear Panel Switches:The back of the computer can look intimidating to computer newbies but it's really pretty simple. At the top of this computer, you can see where the power source (from the AC mains - the household wall outlet) plugs in. It is plugged into the 'power supply'. The power supply converts the mains voltage 115VAC/230VAC to the various voltages needed by the computer (we'll cover those later). On this particular power supply, you can see 2 switches. One is the main power switch. The other is the voltage selector switch. The main power switch completely cuts power to the power supply. Switching this off is essentially the same as unplugging the cord from the power supply. The voltage selector switch allows the power supply to operate with different mains voltages. In Europe and other areas of the world, they use 230VAC (Volts Alternating Current) instead of the 115VAC we have here in the US. 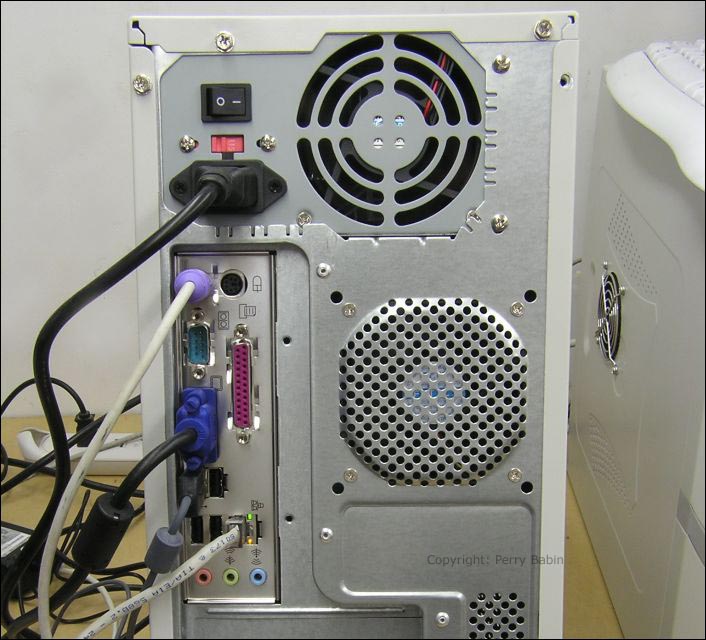
Rear Panel Connectors:On the rear panel of any modern computer, you'll find several common connectors. This is a quick list...* At the top of the connector panel (just below the power supply), you will see two connectors. One has a purple plug in it. The other is open. These are PS/2 ports and are used for the keyboard and mouse. Typically, they are color-coded to match the connectors but these are not.* Just below the PS/2 ports, you see a 9 pin d-sub connector. This connector (with 9 'pins' instead of tiny sockets as are found on the other d-sub ports) is a serial port. It's used for data transfer. In the past, it was used for the mouse. Now it's not used very often except for specialized communications. For example, I have a multimeter that plugs into that port and allows the computer to log data from the meter. Many new motherboards are not offering this connector. If you need to tell a piece of software that you want to to use this port for some function, you will tell it to use the 'COM' port. Below is the multimeter I mentioned and the serial data cable that is used to connect it to the computer. 
* To the right of the serial port connector, you can see a 25 pin d-sub connector. This is a parallel port and it's typically used for older printers. If you have to tell a piece of software to use this port, you will have to tell it to use the LPT-1 port. Most newer printers use USB ports. These are also being phased out. Below, you can see a parallel printer cable. The computer end of the cable has a 25 pin d-sub connector. The printer end has a 36 contact Centronics connector. 
* The next port (left and below the printer port) is the video port (VGA port). It uses a 15 pin d-sub connector. It's where you will plug in your video monitor. Keep in mind that there are significant differences between computers and not all will have a VGA port here (integrated into the motherboard). On some computers, you will have a dedicated graphics (video) card. The dedicated card typically offers much greater performance but can add significantly to the price of the computer. Some popular graphics cards (used by people who play high-end video games) cost more than the entire computer that's used in this tutorial. * Below the VGA port, you can see 4 rectangular ports (one has the mouse plugged into it -- black plug/gray cable). These are the current standard for interconnectivity. Most modern computers have at least 4 ports on the rear panel. Most motherboards have the option to have at least 2 more USB ports that are accessed on the front of the computer (if the case has front panel USB connectors). The following cable is used on most printers and scanners. It's a USB A/B cable. The 'A' end is the flat connector. The 'B' end is the one that's more square. 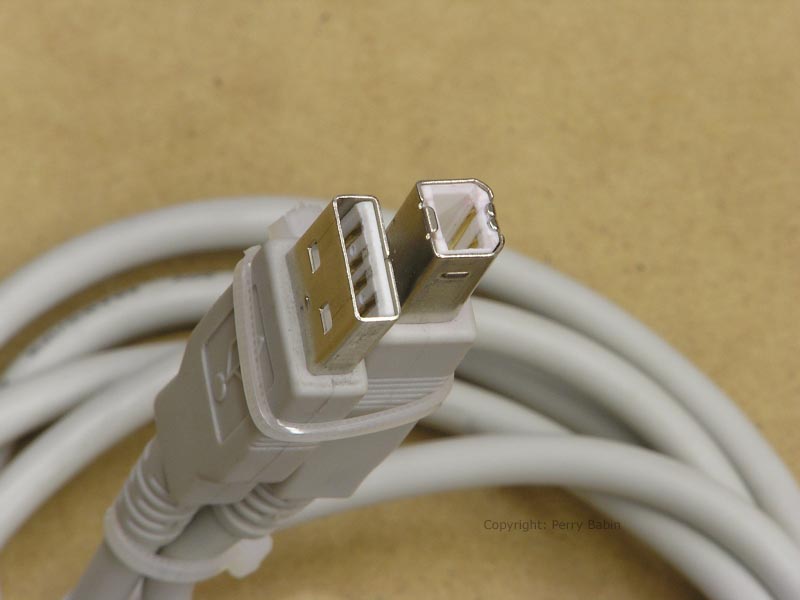
* Just to the right of the lower USB ports, you will find the on-board LAN (Local Area Network) connector. It's an RJ-45 telephone type connector. The LAN allows you to connect to your DSL/cable modem, to the a router/switch or to another computer. One light indicates that the cable is connected to a working port (on the other end). The other light flashes when there is activity through the port. Sometimes, one of the lights will change color to indicate the LAN operating speed but this varies by manufacturer. The following image shows a LAN cable connector. Notice the little lever and the boot that covers the lever. The boot prevents the connector from snagging when you're pulling the cable out of a bundle of other cables. 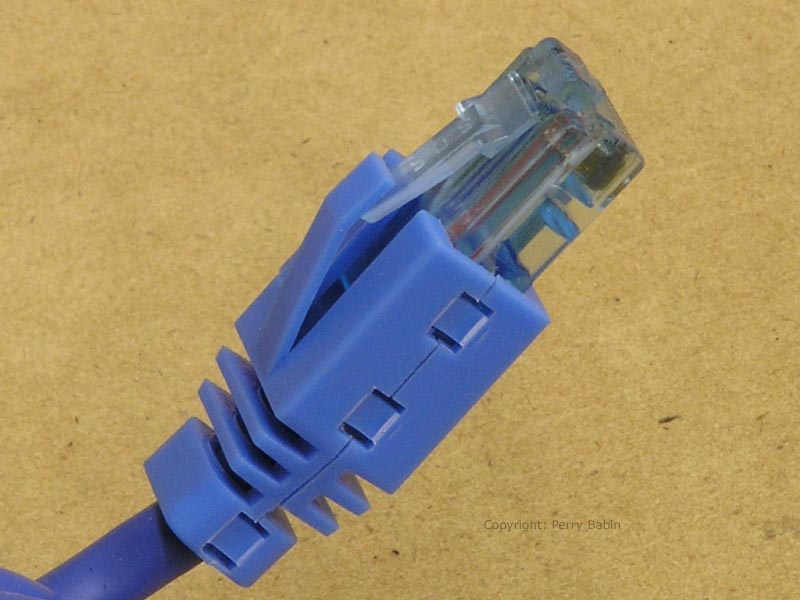
* The round connectors at the bottom of the panel are for audio. The connectors are color coded. By default on this machine, the green is the audio 'output' port. It's where you plug the connector for your speakers or headphones. The blue connector is for audio 'input'. The pink connector is the microphone input. This color coding is for standard '2 channel' audio output. For 6 channel audio (on a board without dedicated connectors for all 6 output channels), the pink and blue connectors double as the surround speaker output, center channel output and sub channel output. To set the blue and pink connectors to be used as outputs, you may have to go into the audio control panel to select the proper setting. A few cards make the change when they sense that you've plugged speakers into the blue and pink jacks but that feature is seldom seen (on the boards that I've used). You have to consult your motherboard's manual to determine what your board has. I'll cover more advanced sound cards later in the tutorial. The next 3 images show the back panel of a different computer. The first image shows color-coded PS/2 ports. These are for the mouse and keyboard. Newer computers don't have these. They use two of the USB ports for the mouse and keyboard. 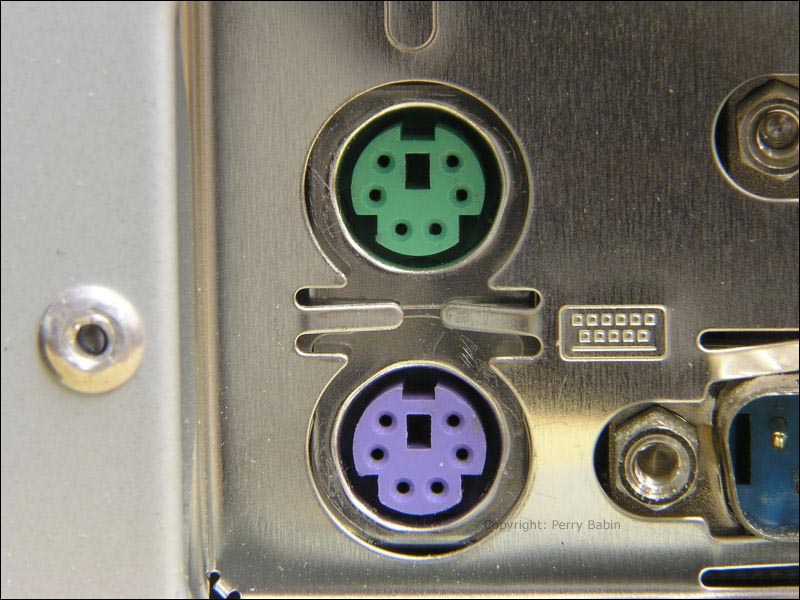
The image below shows all of the d-sub connectors. As you can see, there are little fingers between the metal panel and the connector housings. These assure that there is a good electrical connection between the motherboard's ground and the computer case. You will see similar fingers on all of the case panels. They insure that there is a good electrical connection between the case and the side panels. All of these extra electrical connections prevent leakage of high frequency noise. The noise would not be audible because it's well beyond the audible frequency spectrum (in the radio frequency range). If not contained, the noise would tend to interfere with signals such as video and transmitted radio signals. 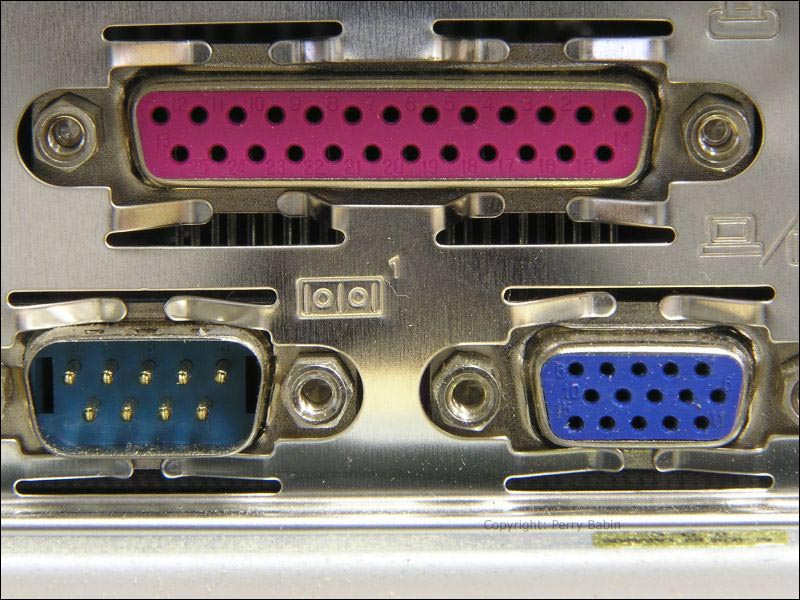
The following image shows the USB, LAN and audio connectors. You'll notice slight differences (such as no lights on the LAN port) but they're essentially the same as the previous computer's rear panel. 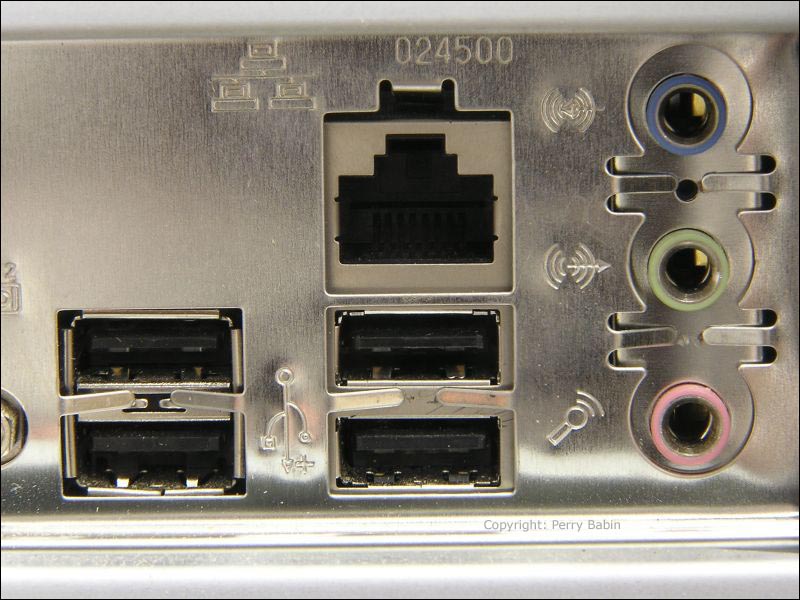
Laptop ComputersThis site mainly covers desktop computers. Many people want a laptop/notebook computer. Unless you're a student or someone in business who must have a laptop, you should NOT buy a laptop computer (unless you have very deep pockets). Laptop computers are relatively rugged but more prone to physical damage because they're constantly being moved. If they're damaged, repairs can be very expensive. In many laptops, virtually every component is part of the motherboard. If any of those components fails and the laptop isn't under warranty, the cost to repair it will likely exceed the cost of replacing it. Desktop computers can often be very cheaply repaired, especially if you use sites like this one to help you understand how they work. Laptops are also more likely to be stolen. Even if you have it password protected, it can still be used by someone who knows how to bypass the password, reload the operating system or replace the hard drive. They can even break it down into components (display, hard drive, keyboard...) and sell the parts. Whether the thief can use it or not, you will no longer have it. If they can access the files on your computer, they then have access to all of the information you had stored on the computer. If you had no backup files, you will have lost important files (photos of friends/family/children...) and documents. | |
|


